Improve Input
Sometimes the base image is of rather bad quality. Although the human’s eye can identify the notes correctly, the algorithms have problems to detect the components of a score correctly.
Table of contents
Using Gimp
[Contribution by Baruch Hoffart]
Here are some possible improvements using Gimp.
Adjust Brightness and Contrast
The simplest way is to adjust the brightness of an input image. Although Audiveris has a very good automatic binarization algorithm, sometimes manual adjustment improves the recognition.
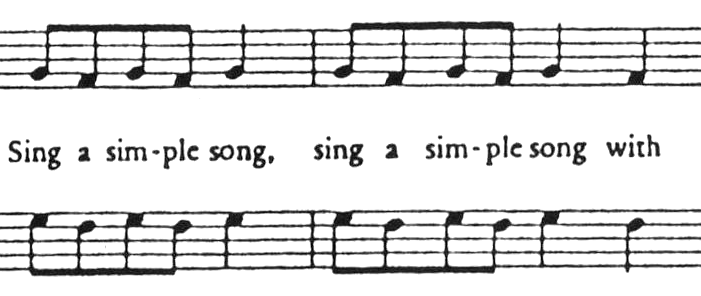
Have a look a the following part of a score: there are a lot of disturbances between the staff lines.

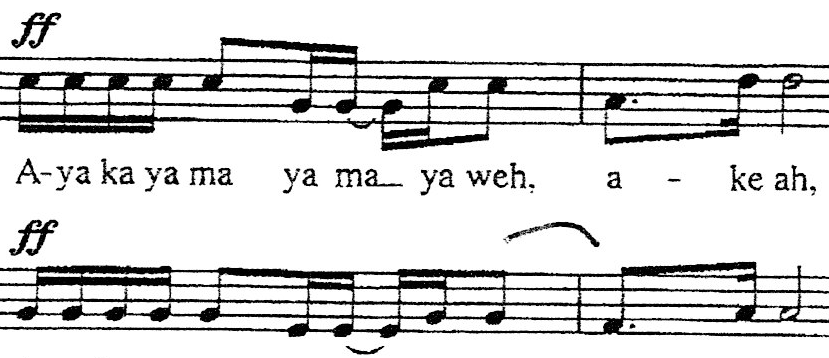
Now simply increase the brightness of the image by using the color curve tool. Keep the dark parts black, to get an image like this:
Improve Image using Filters
Have a look at the following image: here we have a lot of noise in the lines and in the bars. The transcriptions will have problem to properly detect the bars in such a case.
Now use a gaussian blur filter with size 1.5 to 2.0, and you get the following:
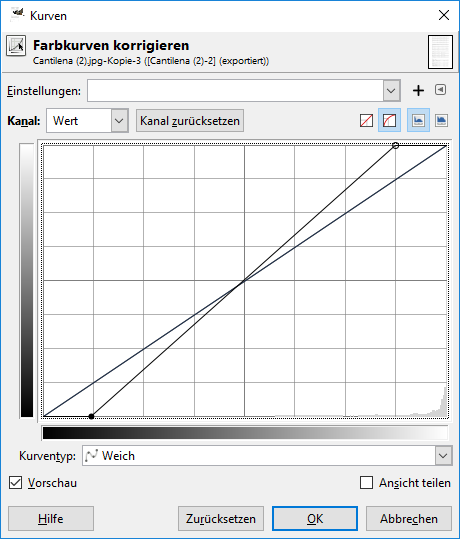
Now use the color curve tool an remove about the top and bottom 10% of the input brightness range (look at the result, the optimal values depend on your input image):
and you get something like this (the stems should still be a close line):
Finally use an “unsharp mask” filter with standard deviation set to about 1.0 to regenerate a sharp image:

You see that now the noise is almost completely removed.
Enlarging Low Resolution Scans
[Contribution by Ram Kromberg]
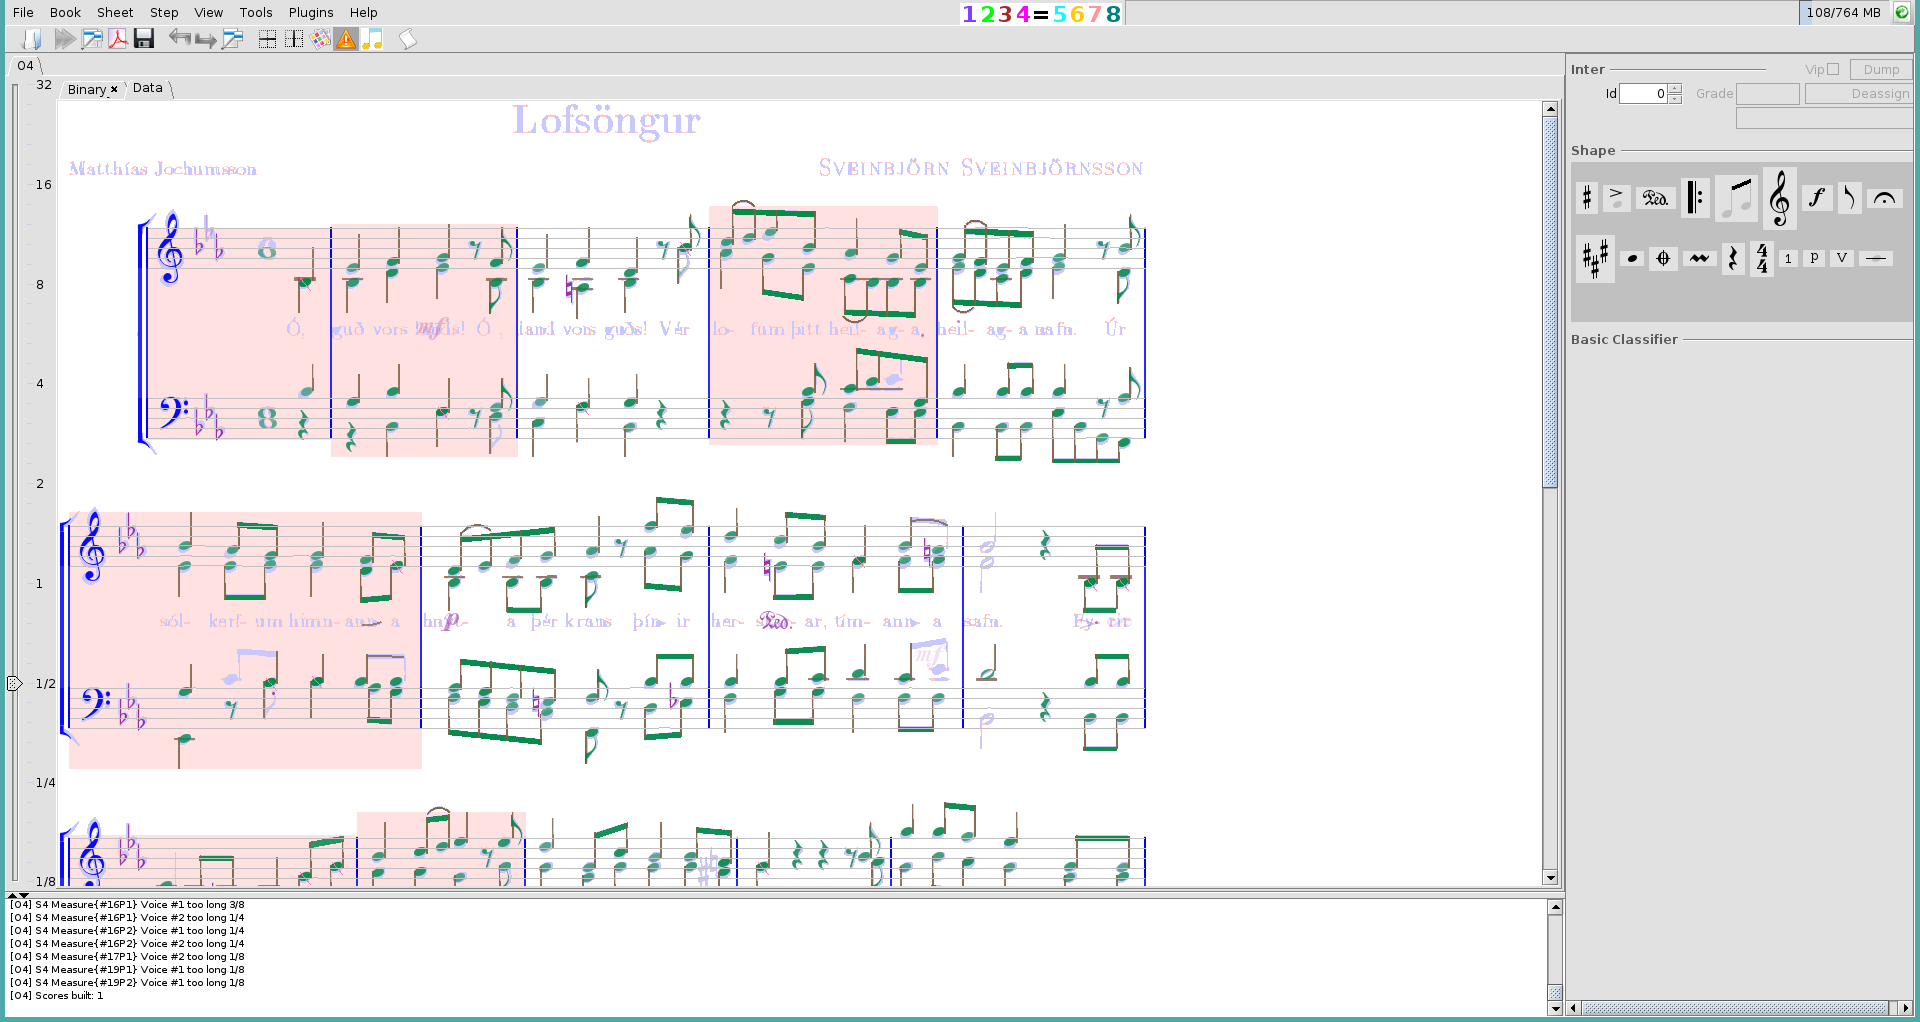
This section describes how to pre-process low resolution sheet music scans before processing with Audiveris OMR.
When attempting to process low-resolution images with Audiveris, one may encounter warnings and/or identification errors.
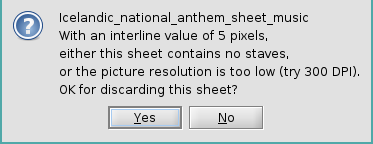
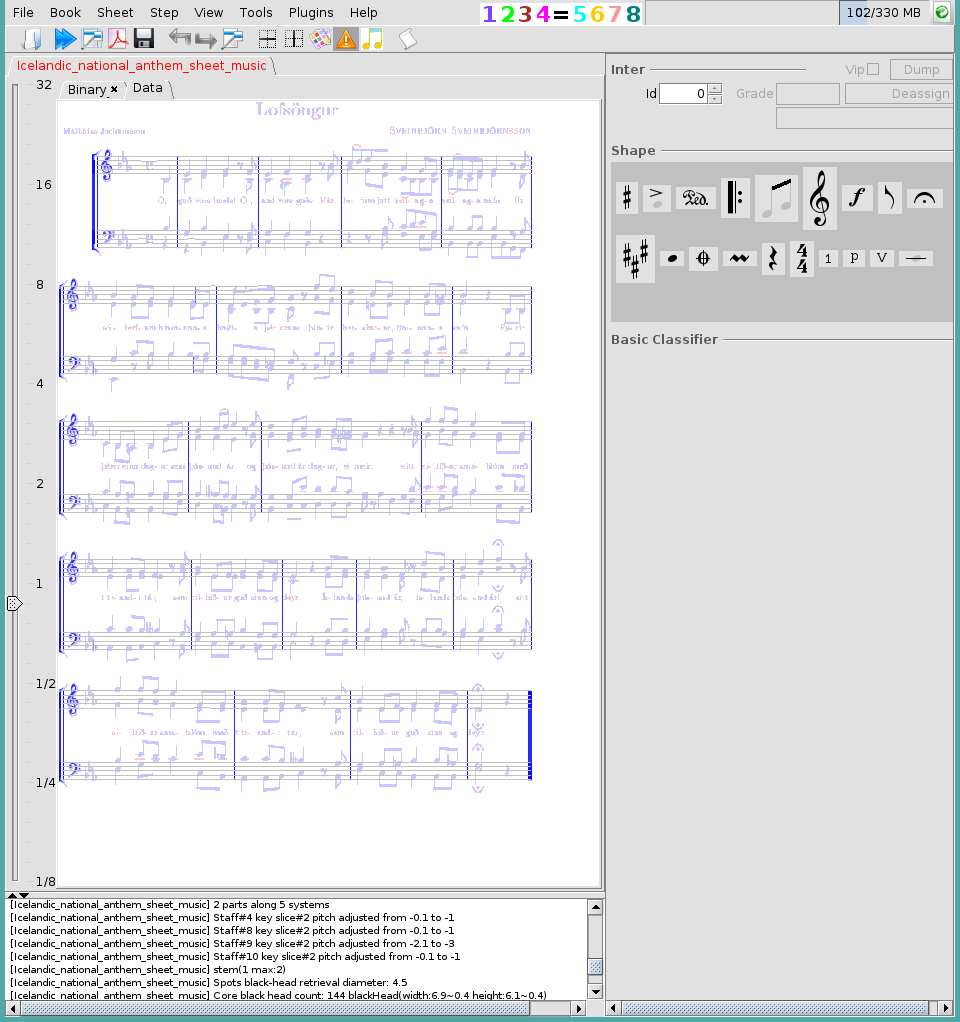
It is possible to improve or even entirely overcome such obstacles using super-resolution processing software and services to enlarge the image before processing with Audiveris. e.g.
This document will detail an example using free, open-source software that is commonly distributed in Linux distributions. Alternatives for Macintosh and Windows will be mentioned as well.
Software Required
- waifu2x. For the enlargement.
- Linux: waifu2x-ncnn-vulkan.
- Windows: waifu2x_snowshell.
- Mac: waifu2x-ncnn-vulkan-macos.
-
ImageMagick. For git-2-png conversion.
-
wget. To download the example image.
-
Audiveris OMR.
Step-by-step
- In this example we’ll be using the Icelandic national anthem as follows:
wget "https://upload.wikimedia.org/wikipedia/commons/6/6c/Icelandic_national_anthem_sheet_music.gif" - Since waifu2x-ncnn-vulkan can’t process gif files, we’ll convert the image to a png using ImageMagick’s convert executable:
convert "is~.gif" 00.png - Finally, we’ll enlarge the converted png:
waifu2x-ncnn-vulkan -s 4 -i 00.png -o O4.png
Notes
-
By default, waifu2x-ncnn-vulkan makes use of the GPU. It is possible to force the use of the CPU with the
-g -1flag and specify the use of more threads with the-jflag. e.g. 4 CPU threads:waifu2x-ncnn-vulkan -g -1 -j 2:4:4 -s 2 -i 00.png -o 04.png. Be advised even low-end GPUs will out-perform the CPU many times over. -
In this example we were forced to override the default scaling to 4x using
-s 4to satisfy Audiveris requirements. There will be times when the default 2x would suffice. Other-times, 4x will prove too much as we’ll cross Audiveris’s maximum pixel capacity. -
When executed to scaling exceeding 2x, waifu2x-ncnn-vulkan will often terminate with
Segmentation fault (core dumped)but would otherwise enlarge the images sufficiently well. -
waifu2x-ncnn-vulkan comes with denoising capabilities that can be used with or without scaling. That is, a severely degraded or poorly focused image may still be recoverable for OMR use as long as it is readable by humans.